Overview[]
- Difficulty: 9★
- Reference: Announcement
- Release Date: 7/20/17, 2452 days ago.
Battle Info[]
Machina of Destruction - ADV[]
| Difficulty | Energy | Battle | Gil | Unit XP | Rank XP | Clear Reward |
|---|---|---|---|---|---|---|
| 42 | 10 | 1 | 205 | 2800 | 300 | |
| Mission | ||||||
| Complete the quest | ||||||
| Deal lightning damage to an enemy | ||||||
| Use black magic | ||||||
| Use a limit burst | ||||||
| Boss | ||||||
| Aigaion, Left Arm, Right Arm | ||||||
Machina of Destruction - PRO[]
| Difficulty | Energy | Battle | Gil | Unit XP | Rank XP | Clear Reward |
|---|---|---|---|---|---|---|
| 72 | 10 | 1 | 475 | 4500 | 450 | |
| Mission | ||||||
| Complete the quest | ||||||
| Deal ice and lightning damage to an enemy | ||||||
| Use green magic | ||||||
| Party of 5 or less (Companion included) | Mini Burst Pot (3) | |||||
| Boss | ||||||
| Aigaion, Left Arm, Right Arm | ||||||
Machina of Destruction - ELT[]
| Difficulty | Energy | Battle | Gil | Unit XP | Rank XP | Clear Reward |
|---|---|---|---|---|---|---|
| 110 | 10 | 1 | 3410 | 220000 | 1700 | |
| Mission | ||||||
| Complete the quest | ||||||
| Use a limit burst | 5 | |||||
| Evoke Ramuh | ||||||
| No magic | ||||||
| Boss | ||||||
| Aigaion, Left Arm, Right Arm | ||||||
Boss Guide (ELT)[]
| Aigaion No. 589 | ||
|---|---|---|
| Race | Machina |
|
| Level | 99 | |
| HP | 10,000,000 | |
| MP | 100,000 | |
| ATK | 500 | |
| DEF | 150 | |
| MAG | 400 | |
| SPR | 150 | |
| Element Resistance | |||||||
|---|---|---|---|---|---|---|---|
| - | - | +50% | - | +50% | - | +100% | +100% |
| Status Ailment Resistance | |||||||
| null | null | null | null | null | null | null | null |
| Other Resistance | |||||||
| Immune to Gravity and Death. Immune to ATK/DEF/MAG break. Vulnerable to SPR break. | |||||||
Abilities[]
- Pew, pew! Zing!: Summon Left Arm.
- Pew, pew! Zap!: Summon Right Arm.
- Genocide Beam: Magic damage (1.8x) to all enemies.
- The light is concentrating: Remove all status effects from caster and use World Destroyer next turn.
- World Destroyer: Magic attack with hybrid damage.
See the mechanics page. Hybrid damage* (10x) to all enemies. - World Destroyer: Magic attack with hybrid damage.
See the mechanics page. Hybrid damage* (5x) to all enemies. - Electromagnetic Burst: Lightning and water magic damage (5x) to all enemies.
Conditional attacks[]
- If Left Arm dies: Pew, pew! Zing!.
- If Right Arm dies: Pew, pew! Zap!.
- 70% HP threshold (Max 1/battle): The light is concentrating. Next turn: World Destroyer, end turn.
- Every 5 turns and below 70% HP threshold: {{#tip-info:Turn count for World Destroyer is tracked based on the start of the battle, not the turn he drops below 70%.}} The light is concentrating. Next turn: World Destroyer, end turn.
- If attacked with water (physical or magic) while charging World Destroyer: Use weaker World Destroyer.
- If attacked with water (physical or magic) on other turn: Genocide Beam.
- If attacked with water (physical or magic) for 3 turns total: Electromagnetic Burst.
Regular attacks[]
- Up to 5 attacks per turn before Right Arm is dead.
- Up to 8 attacks per turn after Right Arm is dead.
- Normal attack.
- Genocide Beam (Max 1/turn).
- Additional attack after a summoned Right Arm (not the original) is dead: Genocide Beam (Max 1/turn).
| Left Arm No. 591 | ||
|---|---|---|
| Race | Machina |
|
| Level | 99 | |
| HP | 4,000,000 | |
| MP | 60,000 | |
| ATK | 800 | |
| DEF | 150 | |
| MAG | 400 | |
| SPR | 150 | |

| Element Resistance | |||||||
|---|---|---|---|---|---|---|---|
| - | +50% | -50% | - | +50% | - | +100% | +100% |
| Status Ailment Resistance | |||||||
| null | null | null | null | null | null | null | null |
| Other Resistance | |||||||
| Immune to Gravity and Death. Immune to ATK/DEF/MAG Break. Vulnerable to SPR Break. | |||||||
Abilities[]
- Arm Burst: Magic attack with physical damage.
See the mechanics page. Physical damage* (10x) to one enemy. - Its left arm has exploded: Magic attack with physical damage.
See the mechanics page. Physical damage* (3x) to all enemies. - Shrug: Remove one enemy from the fight and fixed damage (4000000) to caster.
Conditional attacks[]
- If attacked with lightning (physical or magic): Its left arm has exploded.
- If summoned Right Arm (not the original) is dead: Shrug. Repeat.
Regular attacks[]
- 1 attack per turn.
- Arm Burst.
| Right Arm No. 590 | ||
|---|---|---|
| Race | Machina |
|
| Level | 99 | |
| HP | 4,000,000 | |
| MP | 60,000 | |
| ATK | 800 | |
| DEF | 150 | |
| MAG | 400 | |
| SPR | 150 | |

| Element Resistance | |||||||
|---|---|---|---|---|---|---|---|
| - | +50% | +50% | - | -50% | - | +100% | +100% |
| Status Ailment Resistance | |||||||
| null | null | null | null | null | null | null | null |
| Other Resistance | |||||||
| Immune to Gravity and Death. Immune to ATK/DEF/MAG Break. Vulnerable to SPR Break. | |||||||
Abilities[]
- Pew, pew! Zing!: Summon Left Arm.
- Cure Beam: Restore HP (500,000) to one ally.
- Cure Beam: Restore HP (2,000,000) to one ally.
- Curaga Beam: Restore HP (500,000) to all allies.
- Reflect All: Reflect all spells for 3 turns to all allies.
- Upper Voltage: Increase ATK/MAG (20%) for 3 turns to all allies.
- Metal Coat: Increase DEF (200%) for 3 turns to one ally.
Conditional attacks[]
- If Aigaion is dead and Left Arm dies: Pew, pew! Zing!.
- 50% HP threshold (Max 1/arm/battle): Curaga Beam.
- 30% HP threshold and Aigaion is dead (Max 1/battle): Cure Beam (Hi).
- If Aigaion is below 99% HP threshold: Cure Beam (Lo).
- If Aigaion is dead: Upper Voltage, Metal Coat. Repeat.
- Every 4 turns: Upper Voltage.
- Every 3 turns: Metal Coat.
Regular attacks[]
- Up to 2 attacks per turn before Aigaion is dead.
- Up to 8 attacks per turn after Aigaion is dead.
- Reflect All (Max 1/turn).
- Normal attack.
Monster Summary[]
Left Arm[]
Left Arm has a very simple and limited skillset. Its entire job is to deal a killing blow to the highest ATK unit of your party once per turn. Provoke abilities will still work however. This ability is a magic attack with physical damage, so it can only be evaded with magic evasion. Plan for your party to raise/reraise every turn.
If you hit it with lightning attack (physical or magic), it'll retaliate with an AoE explosion. The damage is high enough to wipe out your party. Avoid this at all cost.
If a summoned Right Arm is killed, Left Arm will snort one of your unit out of battle permanently, and then it will kill itself. It'll keep snorting every time it's summoned back, until all of its lives are used up. This condition will not trigger if Right Arm has not been killed & summoned at least once.
Attacking Left Arm will not yield any LB gauge.
Left Arm can only be summoned 9 times. Killing it 10 times will remove Left Arm permanently from battle.
Right Arm[]
Right Arm is Aigaion's healer and support. It heals Aigaion for 500,000 HP per turn. If you want to kill Aigaion first, you will need to deal more than that per turn.
It has no damaging ability aside from normal attack. You can check the full list of its abilities above. Bring dispel abilities to remove buffs.
Under normal circumstances it'll use 2 actions per turn, unless Aigaion is dead, then it'll use 8 actions per turn. It is also capable of summoning Left Arm if Aigaion and Left Arm died. Take note of this when you are using the brute force method.
Attacking Right Arm will not yield any LB gauge.
Right Arm can only be summoned 2 times. Killing it 3 times will remove Right Arm permanently from battle.
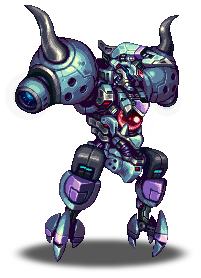
Aigaion[]
The main body, the summoner. Aigaion will keep summoning its arms whenever you kill them, up to the summon limit. Killing Aigaion first is the fastest way to win the battle, but it's also the most difficult.
As far as damage goes, Aigaion will do one AoE magic damage, Genocide Beam, followed by normal attacks per turn. It can use 5 actions per turn if the original Right Arm is alive, or 8 actions per turn after Right Arm is killed once. Genocide Beam will deal decent damage, and normally one beam is not enough to wreck your party, but after the second Right Arm dies, it will start using 2 Genocide Beams until it dies. Make sure your party SPR and mitigation is high enough to handle 2 beams every turn, or you will lose the battle.
Once it hits 70% HP threshold, it'll charge up, and then use its most damaging ability, World Destroyer, the turn after. It'll repeat this cycle every 5 turns once you hit that threshold. Note that the turn count is based on the start of battle and not when he drops below 70%. This means he can prepare for a second World Destroyer right after the first. World Destroyer damage is massive, but can be mitigated several ways:
- Deal water damage (physical or magic) to reduce the damage by half.
- Use defensive buffs: DEF/SPR buffs, damage mitigation, guard.
- Use AoE reraise.
Using AoE reraise is the easiest method, and can be easily achieved with Rikku's or Yan's LB. Be careful when using water attacks on Aigaion, however. If you deal water damage more than 3 times, it'll use Electromagnetic Burst. This ability is separate from World Destroyer and they can be used on the same turn. Avoid that at all cost and don't use water attacks on a normal turn.
Strategy[]
Two ways to defeat Aigaion:
- Slow & Steady: Kill Left Arm 10 times, kill Right Arm 3 times, and then kill Aigaion.
- Brute Force: Kill Aigaion, kill Right Arm, and then kill Left Arm.
Slow & Steady[]
- Kill Left Arm 10 times.
- Kill Right Arm 3 times.
- Kill Aigaion.
This method can take up to 4 hours depending on your setup, but it's still recommended over the brute force method. The best way for you to go through this is to setup your party and abilities in a way that repeat function can be used until you finish the arms phase. But if you want to do it manually, you will have more freedom on picking your units.
The key component of this method is MP sustainability. Since the fight will go on forever, you will need to go through the entire fight without any MP issue, and item can't be counted on since it's limited. There are 3 options: Lunera, Bran, and Ace (awakened ability). Lunera and Bran will need a SPR build to increase the MP refreshed. Ace is a solid choice since he can still deal respectable damage. Since Zargabaath MP sustain is single target, it cannot be used with repeat command.
To protect yourself against Left Arm, you can choose to use a revive, auto-revive, or self-revive unit. Since a unit cannot act after being revived, you will need someone with highest ATK or 100% passive provoke unit to be the sacrifice. The latter is currently not possible. Auto-revive is a better option combined with tank like Warrior of Light, who can use 100% provoke during their turn. Self-revive can also be used, saving you 1 unit slot, but they come with heavy requirements:
- They need to have the highest ATK.
- You will still take damage after reviving, so King low HP revive can be dangerous.
- Note: Revived unit will not receive bard's ongoing song buff.
Revive: Rikku, Y'shtola, or any healer. Using magic spells will disqualify you from no magic mission.
Auto-revive: Rem (80% HP),Vanille+2 (80% HP), Meliadoul (80%), Grim Lord Sakura (80%)
Self-revive: Elza (90% HP), Vargas (80% HP), Maxwell (80% HP), King (50% HP).
Using Rem is not only the safest, but also the least work required to make this work.
Finally, Right Arm has 2 annoying buff that you might want dispelled, AoE ATK/MAG+20% buff (used every 4 turns) and ST DEF+200% buff (used every 3 turns). Their damage don't really ramp up until second half of phase 2. However they will still do a lot of normal attacks, so depending on your setup you might want a dispeller on first phase.
Example party:
- Tilith: There isn't many choice for a strong no-magic healer, but if you don't care about the mission you can replace her with any healer.
- Rikku: Support.
- Lunera: Infinite MP sustain and buff.
- Maxwell: Highest ATK. Self-revive every turn.
- 2 Damage: Anyone will work, the stronger the better, as long as their ATK is weaker than Maxwell. Mage or hybrid will allow you to go wild with their MAG.
Phase 1
Attacks from Aigaion/Left Arm/Right Arm:
- 1 Arm Burst.
- 1 Genocide Beam.
- Up to 5 normal attacks.
Setup the party with the following abilities:
- Tilith: Full heal with Radiant Light.
- Rikku: Dispel with Bushido - Freedom.
- Lunera: Buff with Elven Song.
- Maxwell: Self-revive with Sacred Song.
- 2 Damage: Damage.
Press REPEAT until Left Arm is killed 10 times. This does not mean you can macro repeat and just ignore the game. Be aware of the battle situation at all time.
Phase 2
Attacks from Aigaion/Right Arm:
- 1 Genocide Beam.
- 2 Genocide Beams once two Right Arms are killed.
- Up to 5 normal attacks.
- Up to 8 normal attacks once one Right Arm is killed.
- Up to 7 normal attacks once two Right Arms are killed.
The first two rounds are less dangerous than the previous phase. Once the right arm is killed once, the number of normal attacks will increase, but nothing else changes. The same pattern used to kill the left arm can be repeated for the first two rounds of the Right Arm.
Killing the Right Arm twice will cause Aigaion to start using 2 Genocide Beams every turn until it dies. You will want Rikku to use damage mitigation and keep a SPR buff up. Keep in mind that the Right Arm still performs an AoE buff every 4 turns. Guard it if needed. Kill the last Right Arm, and move on to the last phase.
Phase 3
Attacks from Aigaion:
- 1 World Destroyer during 70% HP threshold and then every 5 turns.
- Will immediately end turn after using World Destroyer.
- 2 Genocide Beams.
- Up to 6 normal attacks.
Aigaion will start dropping LB crystals now. Assuming you can use Rikku's LB every 3 turns, keep it up every time you have one. When it's charging World Destroyer, attack it with water. Rikku has a water attack. Don't do this more than 3 times. If you can't kill it before it's charging fourth World Destroyer, just brace for impact and reraise or mitigate properly. World Destroyer will repeat every 5 turns using global turn counts, and does not start after 70% HP threshold, so the second World Destroyer might come early.
About Electromagnetic Burst: If you decide to bring along Tidus and Rikku (or a mage with Barthundara/Barthundaga), you can mitigate most of the damage caused by Electromagnetic Burst. Because Blitz Mania offers 100% Water Resistance and Hyper NulAll boosts Lightning Resistance by 40%, you can survive both Genocide beams and Electromagnetic Burst if your team is set up correctly (I'd advise minimum of 200 SPR and DEF) and enough buffs are laid out (Preferably Get Pumped and Warrior of Light's Light is With Us). This can allow you to chain water damage and guarantee the weaker World Destroyer. However, you will probably not survive if World Destroyer and Electromagnetic Burst happen on the same turn, so keep track of the next Electromagnetic Burst and have Rikku's LB at the ready.
Brute Force[]
So what makes this method harder than the slow method? Essentially you will have to handle Aigaion's World Destroyer, Right Arm's buff, and Left Arm's killing blow, while still damaging Aigaion with heavy damage, enough to bypass its healing.
This is when reraise cheese strategy is popularized. If you are capable of reraising your whole party every turn, with 1~2 Rikku, you don't really need to worry about death. Though you can still do this strategy even without reraise cheese, as long as your setup and damage is top notch.
Right Arm will rage once Aigaion is dead, so you can make the fight easier by killing them both at the same time, or leaving the Right Arm to a very low health before killing Aigaion. Killing Aigaion first will make Right Arm heal for 2M HP.
Once you kill Aigaion, kill Right Arm, and then kill Left Arm.
Notable Units[]
- Written as of the trial's release date. Will be outdated due to power creep.
| Unit | Notes |
|---|---|
| |
| |
| |
| |
| |
| |
| |
| |
| |
| |
| |
| |
| |
| |
| |
| |
| |
| |
| |
| |
|


Videos[]
Machina of Destruction - PRO[]
| Username | Description | Units | Link |
|---|---|---|---|
| claudius415 | All Missions | No TMR | Ashe, Ashe, Amelia, Amelia, Warrior of Light | YouTube |
| Elegantique | 4 Missions Guide | Ashe, Noctis, Rikku, Tilith, Vargas, Friend: Orlandeau | YouTube |
Machina of Destruction - ELT[]
| Username | Description | Units | Link |
|---|---|---|---|
| faybo0507 | 10 min Fast Kill | Elza, Rikku, Fryevia, Tilith, Tilith, Friend: Fryevia | YouTube |
| Sionar | All Missions, Body First | Tilith, Rikku, Delita, Maxwell, Fryevia, Friend: Fryevia | YouTube |
| claudius415 | All Missions | Body First | Tilith, Rikku, Ashe, Maxwell, Fryevia(837MAG), Friend: Fryevia(862MAG) | YouTube |
| FFBEVids | Use a LB, Summon Ramuh, Arms First | Tilith, Rikku, Y'shtola, Luneth, Orlandeau, Friend: Orlandeau | YouTube |
| claudius415 | All Missions | F2P TMRs & Units only | Slow & Steady Arms First | Tilith, Rikku, Ashe, Maxwell, Warrior of Light, Friend: Fryevia(906MAG) | YouTube |
| Elegantique | 4 Missions Guide (Left -> Right -> Body) | Maxwell, Noctis, Rikku, Tilith, Warrior of Light, Friend: Fryevia | YouTube |
| HHJsyndrome | All Missions | Only Attacker Emperor | Left , Right, Body | Emperor, Zargabaath,Rikku, Tilith, Warrior of Light, Friend: Rem | YouTube |
| DX3mis | All Missions - Brute Force 25min | Maxwell, Tilith, Rikku, Rikku, Fryevia, Friend: Fryevia | YouTube |
| Mitch3ll | All Missions | Rapid Brute Force | Body First | Tilith, Rikku,Delita, Maxwell, Fryevia, Friend: Fryevia | YouTube |
| ffbeMYcommunity | NoTilith No MachineKiller | Brute Force | Body First | Luka, Rikku,Ling, King, Fryevia, Friend: Fryevia | YouTube |
| Coolbeatlim | All Missions | Body First | Step By Step Strategy Guide | Tilith, Rikku,Orlandeau, Ashe, 2B, Friend: 2B | YouTube |
| Cyanide0k | Body First | Brute Force | Fast All Missions (Except Esper) | Elza, Tilith, Rikku, Soleil, Fryevia, Friend: Fryevia | YouTube |
| Sephiroth FFBE | All Missions | Body First | Brute Force | No Machine Kiler | Rikku, Warrior of Light, Fryevia, Ashe, Maxwell, Friend: Fryevia | YouTube |
| jimmymsz | All Missions | Body First | Brute Force | No A2, No 2B, No Fryevia | ~20 minutes | Wilhelm, Onion Knight, Tilith, Ace, Rikku, Friend: Onion Knight | YouTube |
| GLDrakox | All Missions | Body First | Brute Force | A2 | Warrior of Light, Tilith, Vanille, Rikku, A2, Friend: A2 | YouTube |
| Socremus | All Missions | Low Method | No Base 5* | Warrior of Light, Tilith, Bran, Meliadoul, Rikku Friend: A2 | YouTube |
| Lordfab | F2p + 2B Fixed Dice | Strategy in French | Orran, Shantotto, Shantotto, Lightning, Soleil Friend: 2B | YouTube |
| Ernie | Two man | Explorer Aileen, Lotus Mage Fina | YouTube |
| ffbeMYcommunity | Dragonlord burns Aigaion like a BOSS | Nyx x2, Warrior of Light, Meliadoul, Rikku, Friend:Dragonlord | YouTube |
| RanDall | 7* Olive one shot | One Mission | Olive, Ace, Maritime Strategist Nichol,Rinoa, Barbariccia | YouTube |
| xero806 | 7* olive OTKO | Lexa, Lexa, Blossom Sage Sakura, Seven Friend: Olive | YouTube |
| Jason Gaming | All Missions | 2x Ashe, Rikku, Mystea,Meliadoul Friend: 7* Olive | YouTube |
| Mr. Eiko | First turn OTK | Shantotto, Lexa, Pure Summoner Rydia, CG Lid, CG Nichol, Friend: Rinoa 7* | YouTube |
| Naisya | Perfect solo kill | Zargabaath | YouTube |
| David Aka Aztek | AMC + Guide (5 man Budget) | Garnet, WoL, Deuce, Rikku, Emperor | YouTube |
| Flip_Method | All Missions | Medius, Medius, Medius, Medius, Medius, Medius | YouTube |